
Spread the Christmas love & cheer!
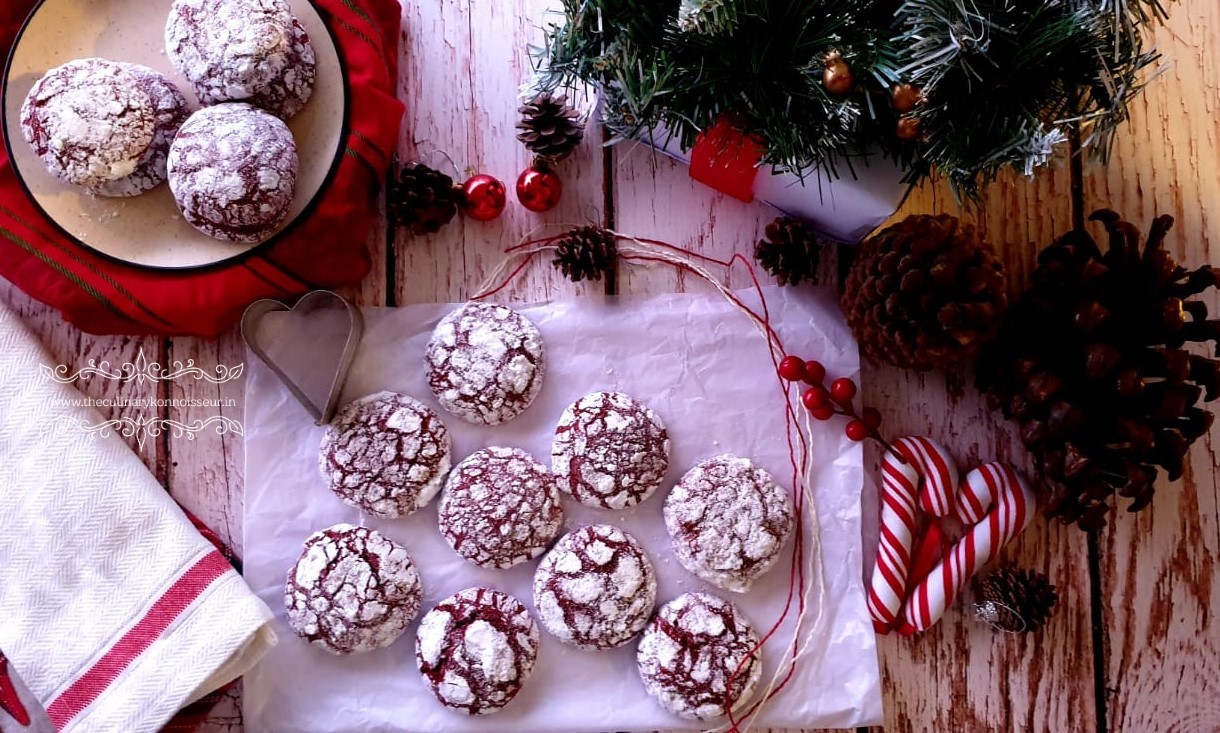
Don’t these cookies spell H.O.L.I.D.A.Y.S to you in capital letters?
This post comes with all my love to all the beautiful kiddies out there, big & small, sweet & naughty ones, all excited about their holidays, promising to be as good as they possibly know how to be & eagerly looking forward to Santa coming down their chimneys & windows!
And if you do not have any kids, fret not, this recipe is great for you to celebrate the child in you!
Perfect for the Yuletide season & guaranteed to lift up your spirits with their soft, moist, fudgy centre, these cookies are a must-bake in your home in the coming week, offering you that sugar-fix you are most likely to be craving for & then leave you craving for even more, thanks to their not-too-sweet, mild chocolatey flavour!
The best thing about baking cookies is that apart from being one of life’s simplest pleasures, they are easy to make, kind on newbie home bakers & ask for common kitchen ingredients such as butter, flour, sugar, eggs.
There are tons n tons of cookie recipes of course, but I have chosen a particularly simple yet unique festive one, again from Tessa Arias, which when baked to a beautiful thick chewy texture, will bring along a gorgeous buttery aroma wafting through your entire home -the ideal way to spread Christmas cheer & love, more so for those having a white Christmas in a beautiful winter wonderland full of snow!
After all, this year has brought a mixed bag of emotions for everyone, everywhere the world over. Often, just spending a tiny moment in our prayers for those less fortunate, praying for our families & loved ones near and far, while giving thanks for all that our lives have been abundantly blessed with, most certainly warms our hearts. Isn’t that what Christmas spirit is all about essentially, the spirit of giving?
So get your baking gloves n hats on & 1.2.3..sing along with me…Let it Snow, Let it Snow, Let it Snow!
Recipe for Festive Red Velvet Cookies
Ingredients
- 2 cups (250 grams) all-purpose flour
- ¼ cup (20 grams) cocoa powder
- 1 teaspoon baking powder
- ¼ teaspoon baking soda
- 4 tablespoons (60 grams) butter
- ½ cup (100 grams) light-brown sugar
- ½ cup (100 grams) granulated sugar
- 2 large eggs, at room temperature
- 1 tablespoon milk
- 1 teaspoon vanilla extract
- 1 teaspoon red gel food colouring, I used Colour mist brand
- ½ cup (63 grams) powdered sugar, for coating
Procedure
- Preheat the oven to 180 degrees Celsius for about 10 minutes.
- Line two aluminium baking trays preferably with parchment or butter paper for best results in cookies.
- In a medium bowl, sift together all the dry ingredients flour, cocoa, baking powder, baking soda, and salt.
- Heat the butter in the microwave until melted.
- Add the brown sugar and white sugar to the warm butter and stir well.
- Allow to cool before stirring in the eggs, one at a time.
- Now stir in the milk, vanilla, and food colouring.
- Gently mix in the flour mixture using light folding techniques.
- Cover in cling film and refrigerate for about 30-35 minutes until firm enough to scoop.
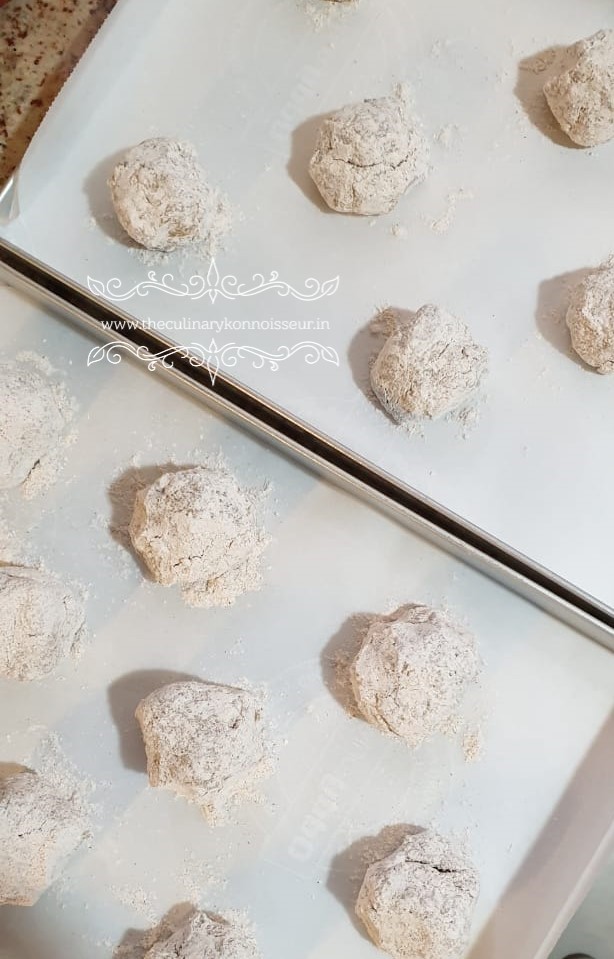
- Using an ice cream scoop or a large oiled tablespoon, divide the dough into 1½ tablespoon sized balls and drop them onto the prepared baking sheets, allowing for 2 inches of space between them as shown in the picture.
- Pour the powdered sugar into a medium bowl and roll the dough balls twice in it, letting them sit in sugar between coatings.
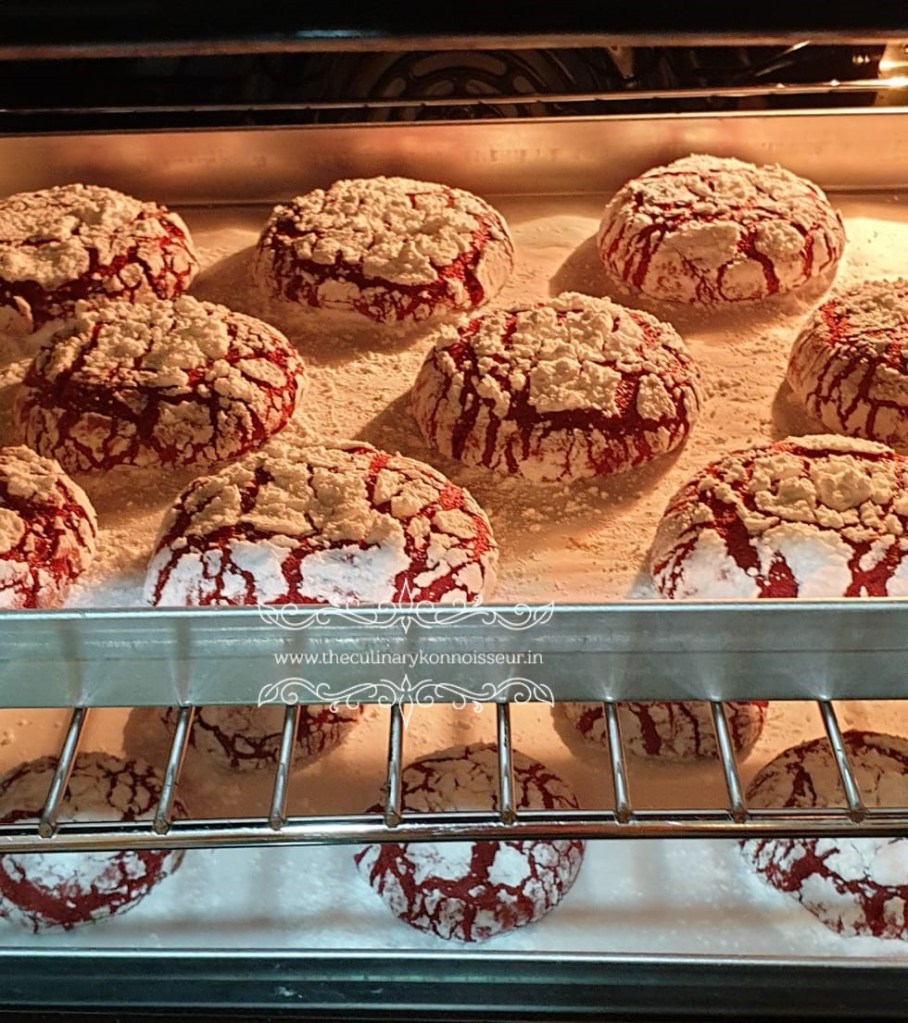
- Bake until cookies have spread and the top appears cracked about 12 to 13 minutes. Do not overbake.
- Remove the baking trays from the oven & cool for 5 minutes.
- Remove onto wire racks to cool completely.
- Cookies can be stored in an airtight container at room temperature for up to 3 days.
Notes:
- Always remember to measure out your ingredients perfectly using a measuring cup and spoon or weighing scale.
- Cookie recipes always ask for either melted butter or soft butter at room temperature and this is an important point to note and follow.
- Don’t forget to chill your cookie dough for at least 30 minutes before baking, to enjoy a good thick texture.
- A combination of baking powder and baking soda is a key element in this recipe.
- Do not overbake the cookies, allow for a slightly soft texture while coming out of the oven.

So lovely Amrita, it actually feels like snow flowing over the red velvet….I like the rough texture of the cookies….I must try making them, thank you so much for sharing your recipe
LikeLike